
# PageView
PageView widget을 사용하면 한 화면에서 여러 페이지를 보여줄 수 있다.
구현 방법은 쉽다. 다음과 같이 PageView를 생성하고, children이라고 선언된 부분에 List 형태로 값을 넣어주면 된다.
import 'package:flutter/material.dart';
class HomeScreen extends StatelessWidget {
const HomeScreen({Key? key}) : super(key: key);
@override
Widget build(BuildContext context) {
return Scaffold(
appBar: AppBar(
title: const Text('Flutter Code Sample'),
),
body: PageView(
children: const <Widget>[
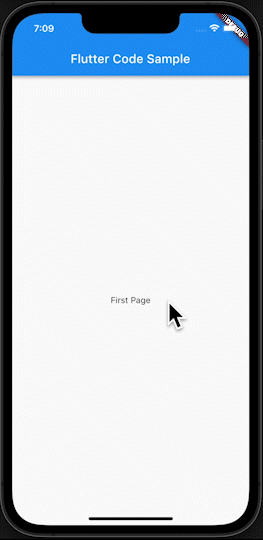
Center(
child: Text('First Page'),
),
Center(
child: Text('Second Page'),
),
Center(
child: Text('Third Page'),
),
],
),
);
}
}
Functional Programming의 특성을 이용해 다음과 같이 .map 함수를 이용해서 조금 더 간단하게 구현 가능하다.
import 'package:flutter/material.dart';

class HomeScreen extends StatelessWidget {
  const HomeScreen({Key? key}) : super(key: key);

  @override
  Widget build(BuildContext context) {
    return Scaffold(
      appBar: AppBar(
        title: const Text('Flutter Code Sample'),
      ),
      body: PageView(
        children: ['First', 'Second', 'Third']
            .map(
              (e) => Center(
                child: Text('$e Page'),
              ),
            ).toList(),
      ),
    );
  }
}
이런 방식은 아이템의 수가 많아졌을 때를 대비할 수 있다.
# PageController
PageController를 추가해서 조금 더 디테일한 작업을 할 수 있다.
Timer를 추가해서 특정 시간마다 자동으로 슬라이드 되도록 만들어보자.
먼저 이를 위해 StatelessWidget을 StatefulWidget으로 변경해야한다.
그리고, State에서 PageController와 Timer를 선언한다.
class _HomeScreenState extends State<HomeScreen> {
  Timer? timer;
  PageController controller = PageController(
    initialPage: 0, // 초기 페이지의 index 지정
  );
//...
PageController에는 initialPage 값을 추가해서 초기 페이지 index를 지정하자.
initState() 함수를 추가해서 자동 슬라이드를 위한 기능들을 구현하자.
@override
void initState() {
  super.initState();

  timer = Timer.periodic(Duration(seconds: 4), (timer) {
    int currentPage = controller.page!.toInt(); // 현재 페이지를 가져옴, Double 타입인 이유는 사진이 넘어가는 중간에는 소수점 단위이기 때문
    int nextPage = currentPage + 1;

	// 2 초과이면 우리가 세팅한 페이지를 넘어가기 때문에 0으로 초기화
    if (nextPage > 2) {
      nextPage = 0;
    }

	// 컨트롤러에 애니메이션 효과를 줄 수 있음
    controller.animateToPage(
      nextPage,
      duration: Duration(milliseconds: 400),
      curve: Curves.linear,
    );
  });
}
그리고 PageView에는 controller 속성을 추가해서 앞서 선언한 Controller를 매핑해준다.
body: PageView(
  controller: controller, // pageView에 controller 생성
  children: ...
)
메모리릭이 발생하지 않게 하기위해 dispose() 함수를 추가해서 컨트롤러와 타이머를 메모리에서 제거하도록 하자.
@override
void dispose() {
  controller.dispose(); // controller도 dispose해줘야 메모리 릭 이슈가 발생하지 않는다.
  if (timer != null) {
    timer!.cancel();
  }

  super.dispose();
}
# 마무리
자 이제 4초마다 자동으로 슬라이드되는 기능을 확인할 수 있다.
전체 소스코드는 다음과 같다.
import 'dart:async';

import 'package:flutter/material.dart';

class HomeScreen extends StatefulWidget {
  const HomeScreen({Key? key}) : super(key: key);

  @override
  State<HomeScreen> createState() => _HomeScreenState();
}

class _HomeScreenState extends State<HomeScreen> {
  Timer? timer;
  PageController controller = PageController(
    initialPage: 0,
  );

  @override
  void initState() {
    super.initState();

    timer = Timer.periodic(Duration(seconds: 4), (timer) {
      int currentPage = controller.page!.toInt();
      int nextPage = currentPage + 1;

      print('nextPage: $nextPage');
      if (nextPage > 2) {
        nextPage = 0;
      }

      controller.animateToPage(
        nextPage,
        duration: Duration(milliseconds: 400),
        curve: Curves.linear,
      );
    });
  }

  @override
  void dispose() {
    controller.dispose();
    if (timer != null) {
      timer!.cancel();
    }

    super.dispose();
  }

  @override
  Widget build(BuildContext context) {
    return Scaffold(
      appBar: AppBar(
        title: const Text('Flutter Code Sample'),
      ),
      body: PageView(
        controller: controller,
        children: ['First', 'Second', 'Third']
            .map(
              (e) => Center(
                child: Text('$e Page'),
              ),
            ).toList(),
      ),
    );
  }
}